What You Need to Know About Radon Mitigation Cost
When I first started testing homes for radon, most people had no idea the gas was a problem. They thought it was something that happened to other people, in other parts of the country. But after years of field work in St. Louis and the surrounding region, I can tell you that radon is a real concern here. And once a test comes back high, the question shifts quickly from "Do I need to fix this?" to "What will a radon mitigation system cost?"
That question is fair. A radon mitigation system is not a small purchase, and most homeowners have never budgeted for one. They have budgets for new roofs, water heaters, or HVAC repairs. Radon usually lands as an unplanned expense. So understanding the radon mitigation cost upfront helps people plan, ask the right questions, and avoid getting taken by contractors who do not understand the local soil or the EPA guidelines.
What Drives Radon Mitigation Cost
The short answer is that it depends on the house. Every foundation behaves differently. The soil gas moves through cracks, joints, and porous concrete in ways that are not always predictable. But the biggest factors are the type of foundation, the layout of the house, and the accessibility of the radon entry points. In St. Louis, we see a mix of basements, slab-on-grade homes, and houses with crawl spaces. Each of those calls for a slightly different approach.
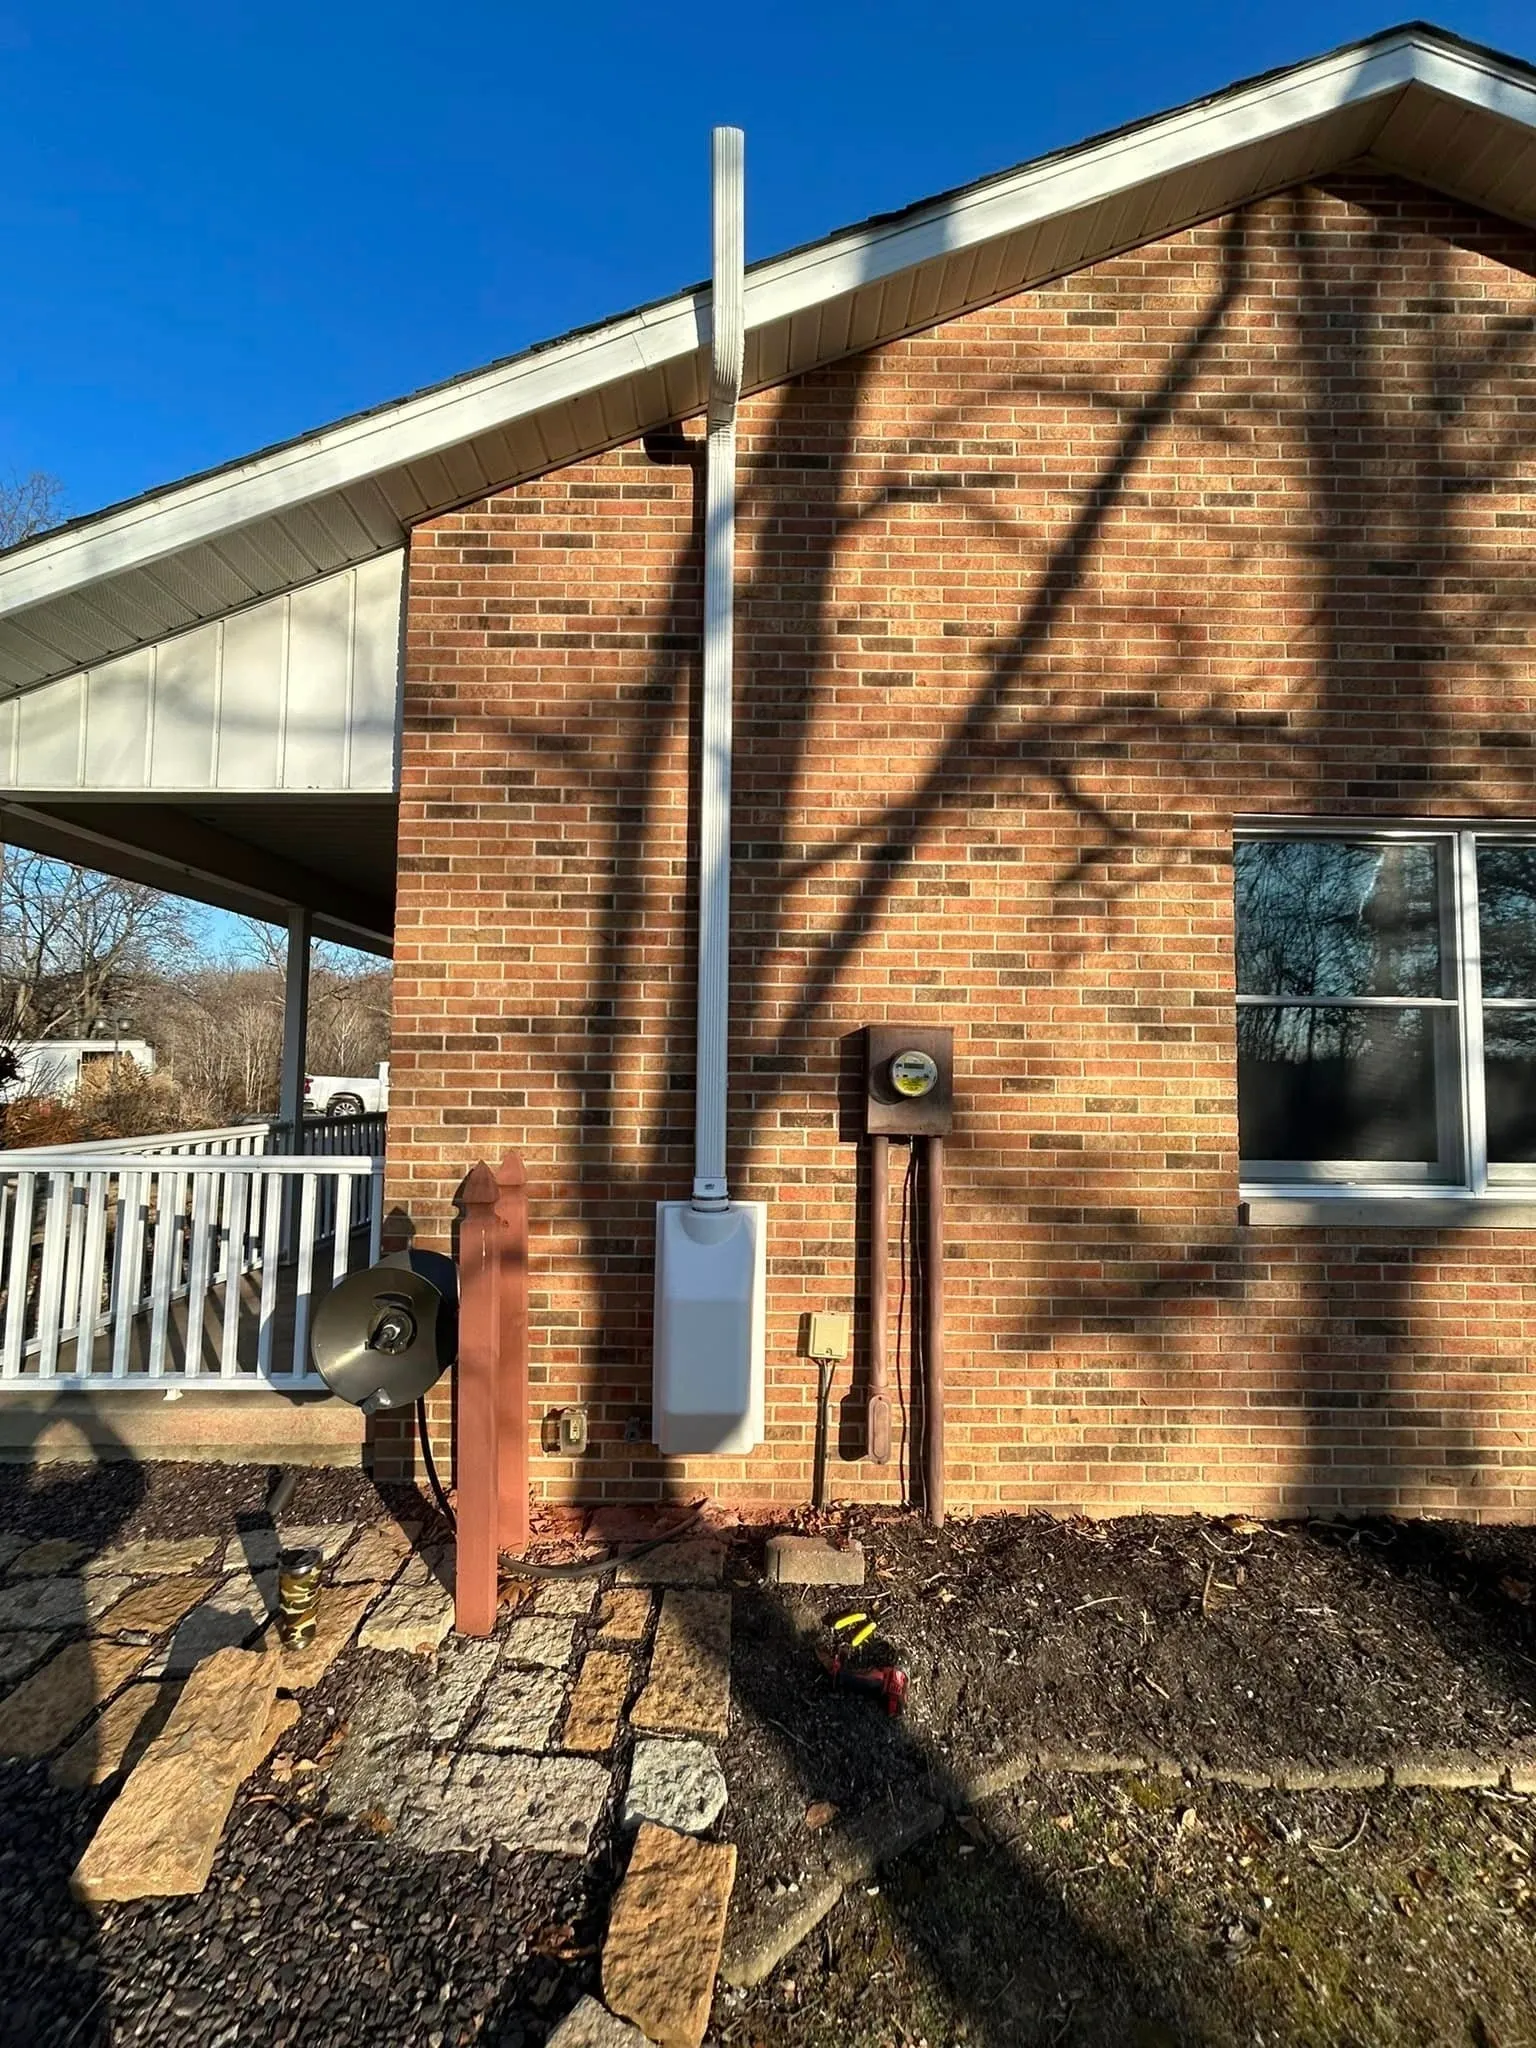
For a typical basement with a poured concrete floor, the standard fix is sub-slab depressurization. That means drilling a hole through the floor, pulling soil gas from underneath, and venting it above the roofline with a radon fan. The fan runs continuously, creating negative pressure under the slab so the gas cannot push its way inside. That system, installed by a qualified professional, usually falls in a range that most homeowners find manageable. But if the house has a crawl space, the work gets trickier. You might need to run pipe through a pipe chase or under a sump pump area, and the radon fan might need to be mounted outside rather than in an attic. Those extra steps raise the radon mitigation cost.
Another variable is the soil itself. Some soils are more permeable, meaning the gas moves faster. In those cases, the system may need a larger fan or additional suction points. The vacuum gauge, also called a manometer, will tell the installer whether the system is pulling enough negative pressure. If it is not, you may need a second suction pit. That is not common, but it happens. And when it does, the cost goes up accordingly.
Installation Complexity and Labor
I have seen houses where the installers had to cut through two feet of concrete to reach the gravel bed underneath. I have also seen houses where the concrete was three inches thick and the whole job took half a day. The difference in labor time is significant. Access matters too. If the radon fan needs to be mounted in an attic with no walkway, the electrician charges more because it is harder to work in tight spaces. If the exhaust pipe has to run through finished walls, the drywall repair adds cost. These are not hidden fees. They are just realities of the work.
Some homeowners ask whether they can do the work themselves. I understand the appeal. But active soil depressurization is not a weekend project. It requires understanding how the radon stack effect works inside a house, how to size the fan, and how to verify that the system is actually reducing the radon level. The post-installation verification alone is worth paying for. Without it, you have no way to know whether the system is working. A continuous radon monitor or a follow-up radon test kit is the only reliable check. Most professionals include that verification in their price.
Breaking Down the Numbers
To give a ballpark, a straightforward sub-slab depressurization system for a typical basement in St. Louis runs between $900 and $1,500. That covers the drilling, the pipe, the radon fan, the manometer, and the exterior vent. It also includes the post-installation verification with a continuous radon monitor. If you need a second suction point or the crawl space is hard to reach, the price can climb into the low $2,000s. Homes with multiple slabs, like a basement plus a garage slab, may need separate systems. That pushes the radon mitigation cost higher, but it is usually the right approach.
I have also worked on houses where the radon entry point was a sump pump pit. In those cases, the solution was to seal the pit with a gasketed lid and vent it through a pipe chase. That is a less expensive fix, but it only works if the pit is the only source. More often, the gas is coming through the whole slab. Sealing every crack with sealant helps but is not a substitute for active depressurization. The sealant reduces the amount of air that the fan has to pull, which can improve performance, but it does not replace the fan.
Radon-Resistant New Construction vs. Retrofits
If you are building a new home, the cost picture changes completely. Radon-resistant new construction typically includes a layer of gravel under the slab, a vapor barrier, a vent pipe running up through the house, and an electrical stub for a future fan. That adds maybe a few hundred dollars to the build cost. It is far cheaper than retrofitting a system later. I tell anyone building a home in St. Louis to include it, even if the initial radon test is low. The radon stack effect can change over time as the soil settles and the house settles. Having the rough-in already in place makes future mitigation simple and inexpensive.
For existing homes, the radon mitigation cost is what it is. But I think it helps to put that cost in context. A mitigation system lasts many years. The radon fan itself may need replacement after ten to fifteen years, but the piping and the slab penetration are permanent. The electricity cost to run the fan is negligible, usually less than a light bulb. So the upfront cost is not a recurring expense. It is a one-time investment in your family's health. The EPA recommends that any home with radon levels at or above 4 picocuries per liter be mitigated. In my experience, that is a sensible threshold. And the cost of mitigation is small compared to the potential health risk of long-term exposure.
Hidden Costs and How to Avoid Them
The biggest hidden cost is hiring someone who does not know what they are doing. I have seen systems installed with undersized fans, with the manometer installed incorrectly, or with the exhaust vent too low to the ground. Those systems fail to reduce radon levels, and the homeowner ends up paying twice. The second cost is not doing the post-installation verification. You need to measure the radon level after the system is running to confirm it is below 4 pCi/L. A continuous radon monitor is the best tool for that, but a radon test kit also works if you follow the instructions exactly. Without verification, you are guessing.
Another hidden cost is the sealant work. Some contractors will tell you they can fix the problem just by sealing cracks. That is rarely true. Sealing helps, but it does not stop the soil gas from moving through the concrete itself. Concrete is porous. The only reliable way to stop the gas is to reverse the pressure gradient. That is what active soil depressurization does. If a contractor tells you that sealant alone will work, get a second opinion.
Final Thoughts on Radon Mitigation Cost
When I talk to homeowners, they often want a single number. I understand that. But the honest answer is that radon mitigation cost varies because houses vary. The best approach is to get a professional test first. Then have the same company, or a qualified specialist, assess the foundation and give a firm quote. In St. Louis, Air Sense Environmental has a strong reputation for doing that assessment thoroughly. They look at the radon entry points, the soil gas movement, and the accessibility. They also include the post-installation verification in their standard package. That is the kind of thoroughness that saves money in the long run.
If you are reading this because your test came back high, do not panic. The fix is straightforward and the cost is reasonable for the peace of mind it brings. Just make sure you hire someone who knows the science behind sub-slab depressurization and who uses a manometer to verify the system is pulling correctly. And always, always test after the system is installed. That is the only way to know you are safe.